Saturday, January 21, 2012

Wall Boards

So I'm cleaning up my computer room and I come across an old Expo combination wallboard that we used in the old house (4 years ago).  It is just to big to hang up in the computer room, and it's so bulky with it's metal frame.  So I decided to tear it apart and create two separate boards.

I'm gonna stop right here for a second and mention that it took me almost 30 minutes to figure out how to create the above picture.  I did not know how to combine two pictures and text into one picture! Yay but now I know.  Okay back to the craft at hand.

I used just a handful of materials that I had around the house.

Old wallboard
Tacky Glue
Staples
Scissors
Fabric - I went for patterns that wouldn't show if I put it on crooked!
Packing Tape

- The hardest thing was to tear away the metal frame from the wallboard.  I had to remove all of the screws then use a screwdriver to pry one end off.  I was expecting the dry erase part to be glued onto the backboards but it was not.  So now I have a separate project to work on!
- I placed my board on the fabric and cut the fabric, with a good inch or two extra on each side.


- Then it was off to the ironing board (I do NOT like to iron)
- Once it was done, I placed my fabric right side down and put the backboard onto of it.  I put a line of glue on the top side on one side. I did the smaller sides first (tops/bottoms) Okay my "line" was more like a squiggle
- I pulled the fabric up and over and pressed it into the glue.  Now I'm sure I could have stopped here.
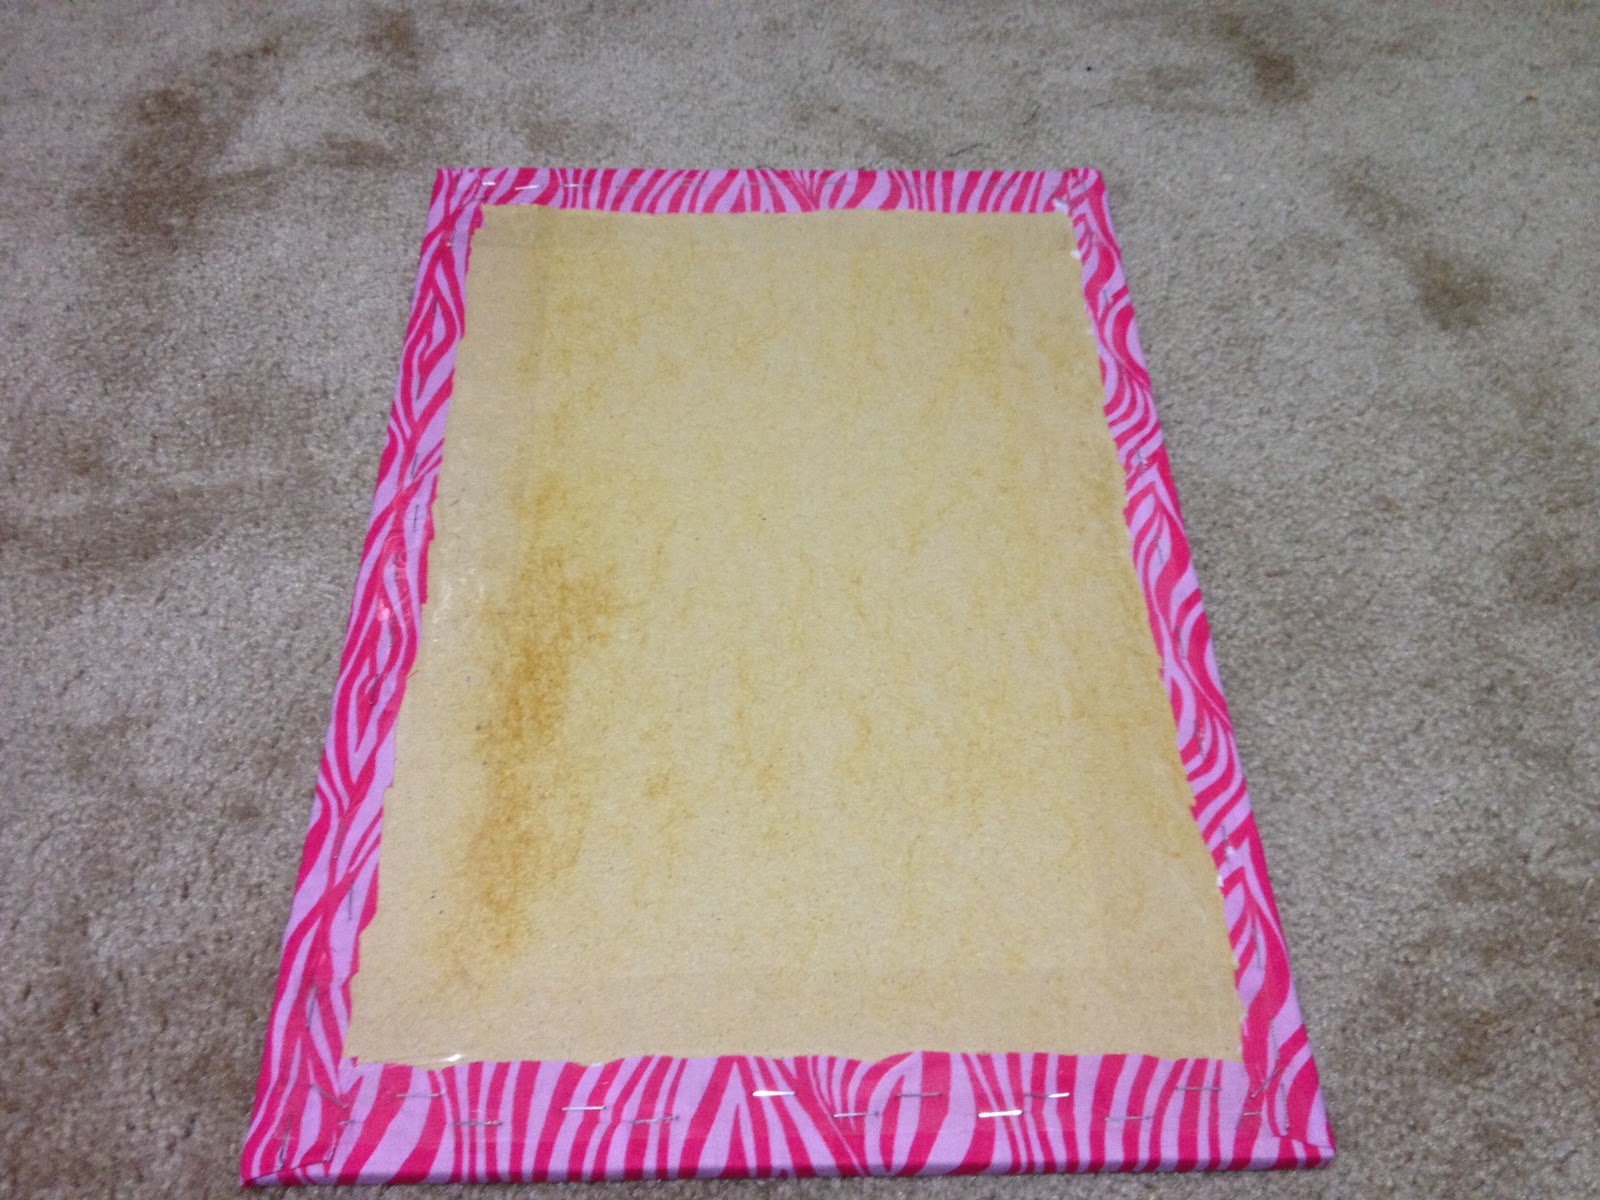
- But I like to know that things are secure, so then I stapled the fabric onto the back.  I did it quickly so the glue could ooze around the staple.

- I repeated this process for the bottom, then the two sides.  On the sides you have to fold in the corners a bit so that it looks nice.
- Once done with all of the glue and stapling I decided to put a strip of packing tape on all of the edges of the fabric.  I figured this way it can't fray. And you can't really see it, since it's gonna be against a wall.

And then it was done! I'm gonna hang it using a few command strips, gosh I love those things!

 I have a cork board in a wood frame that I'm thinking of trying this with, but I'm going to experiment with using a spray adhesive on the front side to hold the fabric onto the board. We'll see.....

Monday, January 9, 2012

Tutu Making #1

I found a great no sew tutu tutorial from Pinterest.  And since Sara loves to dress up, I thought why not.
So imagine us pushing up and down the fabric section of Hobby Lobby looking for fun fabric for a purse.  Well Sara sees an ad for no sew tutu's (which I was gonna make as a surprise) and she's all like "I want one, I want the green one, I need one..."  Thankfully they had their rolls of tulle on sale 50% off.  So I'm pulling up my Pinterest app on the phone trying to see how much I need.  They say 20 yards, but then again, they're making if for a baby.  My kid is 4!  I end up letting Sara pick out 4 rolls, green, pink, purple, and blue.  

This was by far the easiest thing I have ever made.  All I had to do was sew the elastic together (which i didn't even do straight!) then cut and tie off the tulle.  I ended up using all 4 rolls of tulle to make her skirt.  
 After she played with it for hours I decided to tighten the knots holding the tulle.  By doing so it made the gaps smaller together, so I added more pieces, making it a fuller tutu.  She loves it!
I got the directions from http://www.momdot.com/howtomakeatutu

Now she's begging me for a tutu dress.  "Baby mommy's gotta learn how to sew better to make that!"

Purse Making #1

I don't sew that often. Okay rarely! I can make pillows, blankets, pillowcases, a tent (that's another post) and now a purse!


I used the very detailed instructions from Sew4Home (thank you for the pictures!) to create their Scrap It: The Angela Shoulder Bag.
Of course I didn't make this one completely alone! Alex and her 3 boys, and me and my Sara worked really hard on this. Okay the kids played, left toys in the sewing room, Alex and I tripped on them, then there was dinner and somewhere in between all that we made some Jack Daniel Balls and Malibu Balls for my hubby. But with Alex and I tossing around ideas on what the instructions meant and taking turns at the sewing machine, we finally made it! And it even has pockets on the inside. Yay.

This was actually a trial run purse, I'm looking to make a bag to hold all my music and equipment in. This bag can only hold one of my trombone mutes. So I guess it's off to the drawing board. Until then, I'm loving the purse, and have already decided to make another one with some minor adjustments!